Here in this post are details on how to take a screenshot on windows 11.
Though it is a basic task, it is surprising and amusing the number of options one has for capturing and saving images from your screen.
Any tech specialist/ professional or better still any computer user will testify to the fact that there are times when one needs to take screenshots of images on our computer.
Especially for software reviewers, snapping screenshots is something they need to do many times each day. There’s no better way of showing the readers how a program looks in operation than by showing screenshots.
And nearly every computer user occasionally needs to take a screenshot, if only to share what they’re seeing on the screen with a colleague or to make references.
It’s astonishing how long it has taken to perfect this simple capability. Windows has had screen-printing capabilities since the first PCs in the 1980s (their text-based option differed from today’s raster screenshots).
Windows 11 introduced new ways to take screenshots, and taking screenshots in Windows 11 is even smarter with its latest version.
Here, we’re concerned with screenshots in Windows 11. We will discuss of the ways through which users can take screenshots of either the entire screen or a part of it as per their requirement so that you can make an informed decision on which method works best for you.

Description
A screenshot means taking an image of the content on the screen. It could be a part of the screen or the entire screen, and some additional tools can help the user to enhance the quality and output of the screenshot.
Windows 11 introduced new ways to take screenshots, and taking screenshots in Windows 11 is even smarter with its latest version, in which some of it will be detailed in this post.
How To Take Screenshots On Windows 11
Below are listed some of the methods on how to take screenshots on windows 11:
Using the Alt + Print Screen Shortcut:
One can screenshot the screen of their computer or of their entire desktop and also with this method one can capture just the active window instead of the entire desktop
And the way to execute this by using this method is by pressing the “Alt + Print Screen” keyboard shortcut. Like the first method, this also copies the screenshot to the Windows clipboard. That means you need to then paste it into an image editor like Paint or Paint 3D before saving it in a format of your choice.
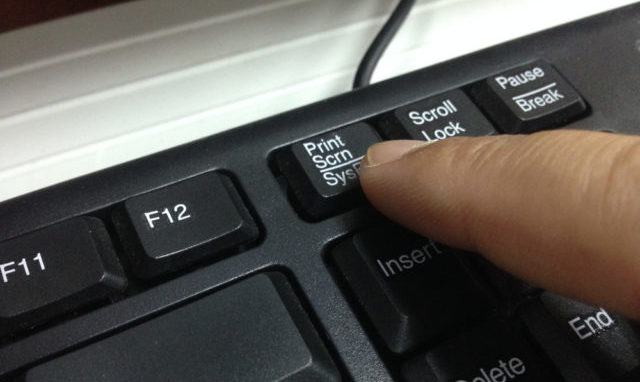
Use PrtSc to Screenshot the Whole Screen:
This method is arguably the most easiest way by which one can take a screenshot on the windows 11 PC. By just pressing the “Print Screen” key (often labeled as PrtScr or PrtScn). You can find the Print Screen key at the top-right section of your keyboard (usually next to the F12 key).
Now, pressing the Print Screen key will take a screenshot of the entire screen, and the image file will be saved to the Windows clipboard.
Use Window Game bar:
Whether you’re in the middle of playing a game on your PC or not, regardless one can also use the Game bar to capture a screenshot.
And the way to go about it is to Press the Windows key + G key to call up the Game bar, which includes an icon looking like a webcam. Tap this to open the Capture section, which has a camera icon. Tap that, and your screenshot is saved to the Videos/Captures folder under your main user folder.
Take Windows 11 Screenshot With Snipping Tool:
The snipping tool is a free tool which is actually a built-in tool by Microsoft in the year 2002 as PowerToy, a set of free utilities intended for windows power users.
And for one to capture your screen with the Snipping Tool, navigate to Start menu search bar, type in ‘snipping tool,’ and select the Best match. The Snipping tool app will be launched. Now click on New, and you’ll be taken to the screenshot overlay.
At the top of the Snipping tool overlay, you’ll see different ways to capture your screenshots: Rectangle Snip, Freeform Snip, Window Snip, Fullscreen Snip, and more.
Then after that you get to select your preferred screenshot method, select the area that you want to capture, and release the cursor. Your screenshot will be successfully captured.
On the app’s main screen, you also have a feature to delay your screenshot. Navigate to Time before snip option (clock icon), click on No delay, and you’ll get a drop-down of different options to choose from.
Conclusion on How To Take Screenshots On Windows 11
In conclusion to the already detailed information concerning how to take a screenshot on windows 11, one should be fully acquitted with the necessary and relevant information when it comes to how to take screenshot of one’s desktop on windows 11.
So it is has been made easy, apply the principles/steps provided above and surely you will reap the desired outcome/result.
Robomin is a freelance writer and blogger who covers topics related to Account Creation, gadgets, Refunds, and how to delete An Account. He has a passion for new and innovative technology and enjoys sharing his knowledge with others